Right then children. If anyone reads this post in its entirety you got too much spare time and if my Mother reads this I am aware of the atrocious grammar sentence construction and or spelling and intend to do nothing about it.
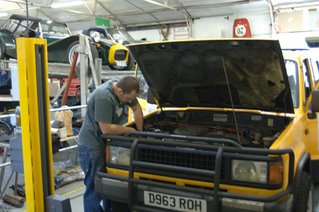
To summarise I spent a week at Vegantune running myself ragged to get quite a serious amount of work done on the Trooper, what follows is a rambling account of what I got done, not forgetting Mr Branfields contribution on sat, perhaps I'll put up another post about the MkI landrover I'm glad we're not driving to Gambia.
I've the work down by area on the car not by chronolgical order.
Brakes
Both front discs and pads needed replacing, removal of the discs requires removal of the entire auto locking front hubs, handy but at least I know how they work now!
Front right behaved itself generally and the calliper was fine after a brief clean and flush through, it was suffering slightly from excessive pad and disc wear causing over extension of the calliper piston.
The front left calliper refused point blank to be removed from the calliper carrier, closer inspection revealed the upper pivot pin was seized inside the calliper, also the cause of the Trooper pulling to the right under braking. Removing the pin was somewhat emotional and included a trip to the local machine shop but was finally resolved by Gary a blowtorch and a hammer, a deadly combination that stubborn pieces of machinery rarely survive.
Having cleaned and reassembled the calliper an initial bleed of the brakes revealed that the pin was also bent. I think this was already bent and contributed to the pin seizing. The result was to hold the calliper un-parallel to the surface of the disc, when the pedal was pressed the calliper first re-aligned, flexing the carrier casting before applying any real braking force, resulting in a crap brake pedal and the likelihood of the brittle casting failing from fatigue.
The pin was ‘persuaded’ back into alignment by yours truly while someone sat in the drivers seat applying the pedal so I could visual inspect the amount and direction of flex. I would like to point out that was an edited and abridged version of events that that in no way captures the unrelenting stream of appalling language and general level of violence aimed at said inanimate object over a 3-4 hour period.
Rear drums were removed and shoes inspected, all found to be tickety boo. Minor lip to drums ground back, drums cleaned, repainted and refitted.
Brakes re-bled and voila, one correctly performing brake pedal.

Front Hubs
Whilst removing the front auto locking hubs I noticed damaged to the left inner bearing seal, the inner bearing race was difficult to remove and closer inspection revealed heaving scuffing and pickup on the stub shaft indicating that a previous bearing had seized and rotated on the shaft.
The bearings didn’t look standard and I may have modified the cage a little during removal so the whole assembly was replaced, involving removal of the bearing seats from the hub itself so new matched pairs can be pressed in. The scuffing on the stub shaft also had to be ground back to allow refitting of the inner bearing.
Both sides were thoroughly cleaned and repacked with lithium grease before re-assembly.
Front lower ball joint
The gaiter had long given up the ghost and the joint was dry and on its last legs and needed replacing. Typically the ball joint bone was connected to the upright bone which was connected to the drive shaft bone which got right in the way of ball joint removal so the top joint had to be cracked, the damper removed, hub half disassembled and driveshaft removed whilst levering out the old joint and replacing. Some of the loads in play are quite significant as the front torsion spring is loaded up to allow removal, again bad language ensued before all was well in the land of suspension.
Rear Diff/Propshaft
The pinion shaft on the rear diff was loose and some muppet had silicone sealed the flange between the shaft and diff to preent oil lose rather than re-torque the shaft which was duly tightend. Job done. Oil was dropped and refilled including a dose of Megapower 1010 lubricant additive.
Engine
Plugs, leads, dizzy cap and rotor and air filter replaced.
Inspection revealed the belt round the water pump was mis-aligned. Removal was require anyway to replace the cam belt. Having finally removed the plastic covers I was able to see there was no adjustment in the water pump shaft i.e. the water pump was working but had modified itself, possibly due to the force applied by the crap thermo-viscous fan attached to the shaft. Inspection revealed a polished length of shaft where the mounting boss used to sit. New water pump ordered.
Cam belt replaced amid usual ringing of hands, have I missed a tooth, is the timing out, is this a interference engine, are the valves going to contact and will the world stop spinning. It didn’t.
Various accessory belts replaced with new items during rebuild.
To allow access I removed the rad, whilst it was out I fitted a proper kenlow electic fan directly to the matrix. This removes the thermo-viscous wonder and a now redundant piece of cowling that was restricting air flow which will help cooling no end.
Oil and filter replaced with a Mega power engine flush and treatment.
Fuel filter replaced and re-routed as the pattern part casing was too big to fit in the original position.
Finally the engine was run with a Mega Power FISC system and additive added to the tank to clean through engine internals. Valve heads and seats etc.
The Cost
This is a quick breakdown of costs and value of the work.
Parts at cost £343
Parts at RRP £460
Mega Power FISC £90
Oils and Fluids £60
Sundries £20
Labour 5 days ~ 40 chargable hours @ £65/hour = £2600
Sub Total £3230 + VAT
Total £3795
This is a rough costing but safe to say that you just paid for this work though a garage it would cost well in excess of £3000. Of course in reality, this would never happen as it far outweighs the value of the vehicle but at least it illustrates the value we’ve added to the Trooper.
Finally thanks to Vegantune, Crazy Horses Racing and Simon at Jet and Helicopter I came out from the weekend having spent a net total of £38 pounds!! This is tied up in parts that were not used and could be returned i.e. would could achieve a net outlay of £0 but we’re hanging on to them to donate with the Trooper.
To summarise I spent a week at Vegantune running myself ragged to get quite a serious amount of work done on the Trooper, what follows is a rambling account of what I got done, not forgetting Mr Branfields contribution on sat, perhaps I'll put up another post about the MkI landrover I'm glad we're not driving to Gambia.
I've the work down by area on the car not by chronolgical order.
Brakes
Both front discs and pads needed replacing, removal of the discs requires removal of the entire auto locking front hubs, handy but at least I know how they work now!
Front right behaved itself generally and the calliper was fine after a brief clean and flush through, it was suffering slightly from excessive pad and disc wear causing over extension of the calliper piston.
The front left calliper refused point blank to be removed from the calliper carrier, closer inspection revealed the upper pivot pin was seized inside the calliper, also the cause of the Trooper pulling to the right under braking. Removing the pin was somewhat emotional and included a trip to the local machine shop but was finally resolved by Gary a blowtorch and a hammer, a deadly combination that stubborn pieces of machinery rarely survive.
Having cleaned and reassembled the calliper an initial bleed of the brakes revealed that the pin was also bent. I think this was already bent and contributed to the pin seizing. The result was to hold the calliper un-parallel to the surface of the disc, when the pedal was pressed the calliper first re-aligned, flexing the carrier casting before applying any real braking force, resulting in a crap brake pedal and the likelihood of the brittle casting failing from fatigue.
The pin was ‘persuaded’ back into alignment by yours truly while someone sat in the drivers seat applying the pedal so I could visual inspect the amount and direction of flex. I would like to point out that was an edited and abridged version of events that that in no way captures the unrelenting stream of appalling language and general level of violence aimed at said inanimate object over a 3-4 hour period.
Rear drums were removed and shoes inspected, all found to be tickety boo. Minor lip to drums ground back, drums cleaned, repainted and refitted.
Brakes re-bled and voila, one correctly performing brake pedal.

Front Hubs
Whilst removing the front auto locking hubs I noticed damaged to the left inner bearing seal, the inner bearing race was difficult to remove and closer inspection revealed heaving scuffing and pickup on the stub shaft indicating that a previous bearing had seized and rotated on the shaft.
The bearings didn’t look standard and I may have modified the cage a little during removal so the whole assembly was replaced, involving removal of the bearing seats from the hub itself so new matched pairs can be pressed in. The scuffing on the stub shaft also had to be ground back to allow refitting of the inner bearing.
Both sides were thoroughly cleaned and repacked with lithium grease before re-assembly.
Front lower ball joint
The gaiter had long given up the ghost and the joint was dry and on its last legs and needed replacing. Typically the ball joint bone was connected to the upright bone which was connected to the drive shaft bone which got right in the way of ball joint removal so the top joint had to be cracked, the damper removed, hub half disassembled and driveshaft removed whilst levering out the old joint and replacing. Some of the loads in play are quite significant as the front torsion spring is loaded up to allow removal, again bad language ensued before all was well in the land of suspension.
Rear Diff/Propshaft
The pinion shaft on the rear diff was loose and some muppet had silicone sealed the flange between the shaft and diff to preent oil lose rather than re-torque the shaft which was duly tightend. Job done. Oil was dropped and refilled including a dose of Megapower 1010 lubricant additive.

Engine
Plugs, leads, dizzy cap and rotor and air filter replaced.
Inspection revealed the belt round the water pump was mis-aligned. Removal was require anyway to replace the cam belt. Having finally removed the plastic covers I was able to see there was no adjustment in the water pump shaft i.e. the water pump was working but had modified itself, possibly due to the force applied by the crap thermo-viscous fan attached to the shaft. Inspection revealed a polished length of shaft where the mounting boss used to sit. New water pump ordered.
Cam belt replaced amid usual ringing of hands, have I missed a tooth, is the timing out, is this a interference engine, are the valves going to contact and will the world stop spinning. It didn’t.
Various accessory belts replaced with new items during rebuild.
To allow access I removed the rad, whilst it was out I fitted a proper kenlow electic fan directly to the matrix. This removes the thermo-viscous wonder and a now redundant piece of cowling that was restricting air flow which will help cooling no end.
Oil and filter replaced with a Mega power engine flush and treatment.
Fuel filter replaced and re-routed as the pattern part casing was too big to fit in the original position.
Finally the engine was run with a Mega Power FISC system and additive added to the tank to clean through engine internals. Valve heads and seats etc.
The Cost
This is a quick breakdown of costs and value of the work.
Parts at cost £343
Parts at RRP £460
Mega Power FISC £90
Oils and Fluids £60
Sundries £20
Labour 5 days ~ 40 chargable hours @ £65/hour = £2600
Sub Total £3230 + VAT
Total £3795
This is a rough costing but safe to say that you just paid for this work though a garage it would cost well in excess of £3000. Of course in reality, this would never happen as it far outweighs the value of the vehicle but at least it illustrates the value we’ve added to the Trooper.
Finally thanks to Vegantune, Crazy Horses Racing and Simon at Jet and Helicopter I came out from the weekend having spent a net total of £38 pounds!! This is tied up in parts that were not used and could be returned i.e. would could achieve a net outlay of £0 but we’re hanging on to them to donate with the Trooper.
About us
- A collective dedicated to the outdoors, the destruction of apathy and the consumption of cake.
- cake stats
0 Responses to “Vegantune Ramblings”
Leave a Reply